

Hey there! As a Pipe Floater supplier, I've seen my fair share of damaged pipe floaters. It's a common issue, but don't worry, I'm here to walk you through how to repair them.
Understanding Pipe Floaters
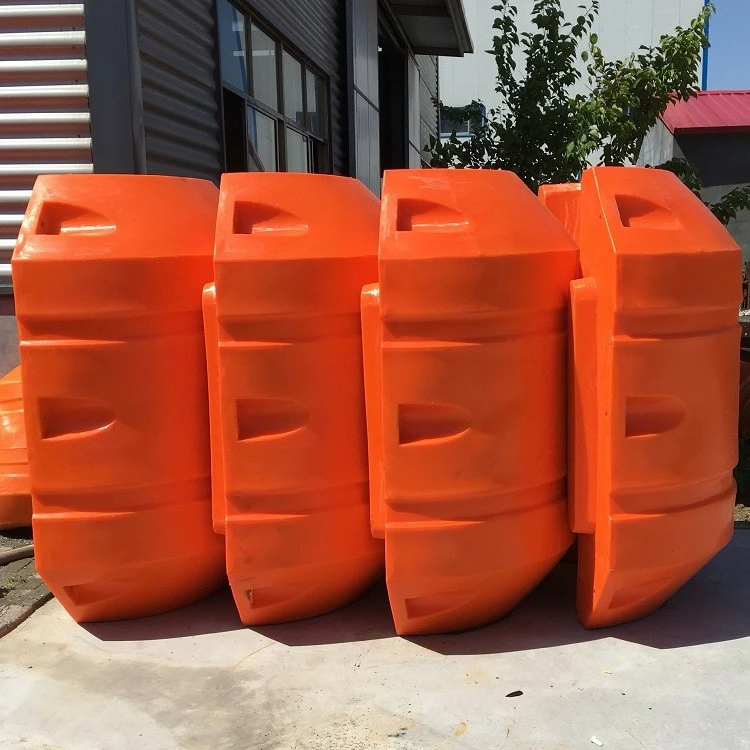
First off, let's talk a bit about what pipe floaters are. Pipe floaters, like the ones you can find at Pipe Floater, are essential for keeping pipes afloat in water. They come in different types, such as Plastic Dredging Pipe Float and Dredging Hose Float. These floaters are made to withstand various environmental conditions, but sometimes they can get damaged.
Identifying the Damage
The first step in repairing a damaged pipe floater is to identify the problem. There are a few common types of damage you might encounter:
- Cracks: Cracks can occur due to physical impact or exposure to harsh chemicals. They can be small surface cracks or deep ones that penetrate the floater.
- Holes: Holes can be caused by sharp objects or wear and tear over time. Even a small hole can lead to water ingress, which can affect the buoyancy of the floater.
- Dents: Dents can be a result of heavy objects hitting the floater. While dents might not always affect the functionality of the floater, they can be a sign of potential structural weakness.
Tools and Materials You'll Need
Before you start the repair process, gather the following tools and materials:

- Epoxy Resin: This is a strong adhesive that can be used to bond the damaged parts of the floater.
- Sandpaper: You'll need sandpaper to smooth the surface around the damaged area and ensure better adhesion of the epoxy resin.
- Putty Knife: A putty knife will help you apply the epoxy resin evenly.
- Safety Gear: Wear gloves and safety glasses to protect yourself during the repair process.
Repairing Cracks
If you've identified a crack in your pipe floater, here's how you can repair it:
- Clean the Area: Use a clean cloth to remove any dirt, debris, or moisture from the cracked area. Make sure the surface is dry before proceeding.
- Sand the Surface: Use sandpaper to roughen the surface around the crack. This will help the epoxy resin adhere better.
- Mix the Epoxy Resin: Follow the instructions on the epoxy resin package to mix the resin and hardener. Make sure to mix it thoroughly.
- Apply the Epoxy Resin: Use a putty knife to apply the epoxy resin to the crack. Make sure to fill the crack completely and smooth the surface.
- Let it Cure: Allow the epoxy resin to cure according to the instructions on the package. This usually takes a few hours to a day, depending on the type of epoxy resin.
Repairing Holes
Repairing holes in a pipe floater is similar to repairing cracks, but you might need to use a patch in addition to the epoxy resin:
- Clean the Area: As with cracks, clean the area around the hole to remove any dirt or debris.
- Cut a Patch: Cut a piece of plastic or fiberglass that is slightly larger than the hole. Make sure the patch is made of a material that is compatible with the floater.
- Sand the Surface: Sand the surface around the hole and the patch to create a rough surface for better adhesion.
- Apply the Epoxy Resin: Apply a thin layer of epoxy resin to the area around the hole and the patch.
- Place the Patch: Place the patch over the hole and press it down firmly. Make sure there are no air bubbles between the patch and the floater.
- Apply More Epoxy Resin: Apply another layer of epoxy resin over the patch to seal it.
- Let it Cure: Allow the epoxy resin to cure completely.
Repairing Dents
If you have a dent in your pipe floater, you can try to repair it by following these steps:
- Heat the Area: Use a heat gun or a hair dryer to heat the dented area. This will make the plastic more flexible.
- Push the Dent Out: While the plastic is still warm, use your hands or a tool to push the dent out. Be careful not to apply too much pressure, as this could cause further damage.
- Cool the Area: Once the dent is pushed out, use a damp cloth to cool the area and set the plastic.
Preventing Future Damage
To prevent future damage to your pipe floaters, here are some tips:
- Proper Installation: Make sure the pipe floaters are installed correctly. Follow the manufacturer's instructions and use the appropriate hardware.
- Regular Inspections: Conduct regular inspections of your pipe floaters to identify any potential issues early on.
- Avoid Harsh Chemicals: Keep your pipe floaters away from harsh chemicals that can damage the plastic.
- Store Properly: When not in use, store your pipe floaters in a dry and cool place.
Conclusion
Repairing a damaged pipe floater is not as difficult as it might seem. With the right tools and materials, you can easily fix cracks, holes, and dents. Remember to follow the steps carefully and take the necessary safety precautions. If you have any questions or need further assistance, don't hesitate to reach out. We're here to help you keep your pipe floaters in top condition.
If you're in the market for new pipe floaters or need more information about our products, feel free to contact us for a purchase consultation. We offer a wide range of high-quality pipe floaters, including Pipe Floater, Plastic Dredging Pipe Float, and Dredging Hose Float.
References
- Manufacturer's instructions for pipe floaters
- Epoxy resin product manuals